Follow these steps to send Ether with Breth...
Important
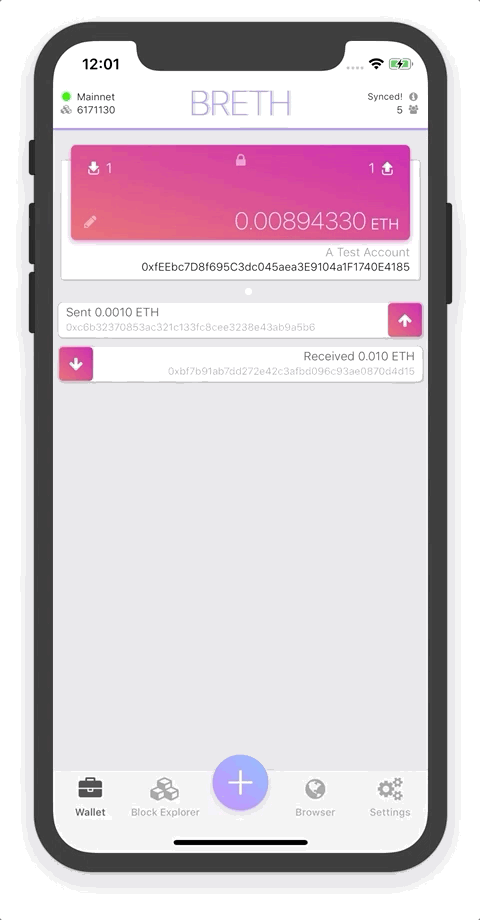
You need to be fully synced to the Ethereum Network in order to send Ether. You can tell when your phone's fully synced by looking at the header bar at the top of your screen and making sure that it reads 'Synced!' and has a green status dot.
If instead it reads 'syncing' or 'finding peers', try connecting to WiFi and give Breth a few minutes to catch up to the Ethereum Network.

To start the process of sending money click on the 'Outgoing Transactions' icon in the top-right corner of the account card or long press the 'Smart Button' at the bottom center of your phones screen, drag your finger to the 'Send' button and lift up.
Note
You can send money from any account that has a 'lock' icon at the top center of the account card. If you see an 'eyeball' then your account is view-only and you'll need to import the accounts Keystore file to be able to interact with it.
There are 3 steps involved with creating a transaction...
- The first step is deciding who's the lucky person your sending money to. We need their accounts address and there's two easy ways to enter this...
- Scan a QR Code (open the scanner by tapping the QR Code icon)
- Copy + paste an address into the recipient field
Once you have an address in recipient field you can tap on the 'Amount' tab to move to the next step.
- The second step is determining how much Ether to send. Tap on the amount field and enter the amount of Ether you'd like to send. If you're connected and synced to the network (green circle icon in the header bar), the 'Gas Amount' and 'Gas Price' fields will update automatically.
- The 3rd step is just a simple overview of the transaction we formed in steps 1 & 2. This shows us how much Ether will be deducted from your account, how much will be consumed by network fees and how much Ether the recipient will receive. If everything looks right click on 'Confirm Tx'. If you're not ready to commit, click 'Discard Tx' to clear all the fields in steps 1 & 2.
Note
If the 'Confirm Tx' button is greyed out, then you haven't properly filled out some of the above feilds. Please revisit the recipient and amount feilds to make sure they're correct.
We're Almost Done
If you clicked on 'Confirm Tx' you'll be prompted to enter your accounts password in order for Breth to 'Sign the Transaction'. You'll be presented a window that has another overview of the 'Signed Transaction'. Give this a look and make sure all the amounts and fees are what you expect them to be. If everything looks right, click 'Accept' to publish the transaction to the network. Alternatively, if you click 'Discard', Breth will delete the 'Signed Transaction'.
Congrats! Sit back and relax...
Once your transaction is published, the Ethereum Network will usually process it within a few minutes. You'll see a transaction entry under your account card with a spinner indicating that the transaction is processing. Once it's processed and confirmed the spinner will switch to an outgoing arrow icon. Congrats! You just successfully sent Ether to the address you chose! YAY!